DLTK's Mini Books - Helping Children Grow
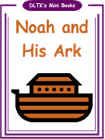 The Story of Noah's Ark
The mini-books are quite simple with images that should appeal to young children and words that children in Grade 1 thru 3 should be able to read themselves.
Feel free to make as many copies as you need (just don't sell them as they're meant to be free for all to use. *grin*).
Use our Noah's Ark Story Sequencing Cards to complement the mini book.
Materials:
- printer
- paper (you can use a slightly heavier paper for a longer lasting book)
- stapler
- something to color with (if using B&W template)
Fold with pictures out

Trim if necessary
stack with odd
numbers on top
staple

enjoy!
Instructions:
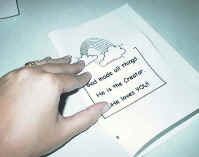
- Print template of choice. The B&W version is fun for young children to color in or for older children to color as gifts for younger ones. I like printing a color cover and B&W pages.
- Color the template pieces if you are doing the B&W version.
- If you imagine a 'real' book for a second, you know that each page
has printing on the front and the back. We're going to fold
the pages to make it like a real book.
- Ignore the cover for now.
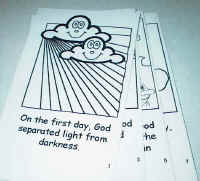
- Fold each page along the center dotted line so the images are on the OUTSIDE and the blank sides of the paper are on the inside (imagine you're making a greeting card).
- You can use a glue stick, if you like, to glue the pages
together (WITH THE EXCEPTION OF THE COVER!)
- Stack the pages, so the odd numbers are on top and the folded edges are lined up. Trim with scissors or cutting board if needed.
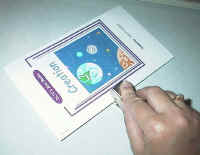
COVER PAGE:
- Fold the cover page along the dotted line, again with the images on the outside.
- OPTIONAL: You can laminate the cover page or print it on cardstock if you want it to be more like a real book's cover.
ASSEMBLE THE BOOK:
- Open the cover page (like a folder) and slip the pages inside so that when you open the cover you'll see page 1 -- the unfolded sides of the pages will go against the folded part of the cover.
- Close the cover page and tap the book so everything lines up.
- Put three or four staples along the edge to hold the book together.
- Flip through the book once, carefully folding the pages to make the book easier for the children to read
PRINTING THE TEMPLATES
- Close the template window after printing to return to this screen.
- Set page margins to zero if you have trouble fitting the template on one page (FILE, PAGE SETUP or FILE, PRINTER SETUP in most browsers).
- There'll be less trimming to do if you also turn off the headers and footers.
Templates:
Page 1 and 2 (color) (B&W)
Page 3 and 4 (color) (B&W)
Page 5 and 6 (color) (B&W)
Page 7 and 8 (color) (B&W)
COVER (color) (B&W)
Printable version of this story