DLTK's Bible Activities
Shield of Faith paper mache Craft
 Contributed by
Our finished shield was about 12 inches x 15 inches (easy for a child to hold) but you can make yours any size your like.
I have included directions for making the shield with a 3 dimensional cross or initial on the front. The cross looks very nifty -- and is reminiscent of many shield designs actually used. Using the child's initial makes it a personal "Shield of Faith". Or put the letter F in the center (to indicate it's a shield of Faith).
< More Armor of God activities
Materials:
- corrugated cardboard (old cardboard box)
- scissors (good strong ones!), case cutter or exacto knife
- masking tape
- newspaper
- Paper Mache -- visit "How to Paper Mache" for the recipe
- 8 sheets of toilet paper
- paint (poster or acrylic paint -- even old latex house paint would work)
- we used gold and grey acrylic paint (silver would be even nicer than grey!)
- a black or white background would also be nice
- gold, silver, red or purple would all be good choices for the raised objects (cross or initial) -- though any color the child likes or you have on hand would work
- paint brush
- raffia, string or wool
- toilet paper roll
Instructions:
 decide on the design for your project.
- If the child wants to be quite creative, have them draw the design of the shield on a piece of paper, it can be a variety of shapes with different things in the center -- otherwise, just do a basic shield and ask them whether they would like a cross or their initial in the center of the shield.
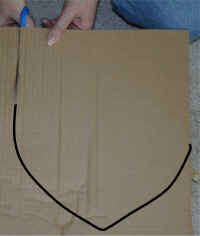
- freehand draw the shield/mask shape on a large piece of cardboard.
- cut it out.
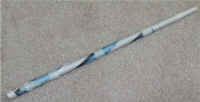 Roll a sheet of newspaper as tightly as possible and tape it in a
few spots so it stays rolled up into a tight tube
Roll a sheet of newspaper as tightly as possible and tape it in a
few spots so it stays rolled up into a tight tube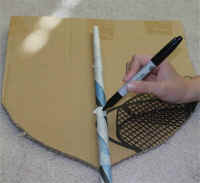 lay the rolled up sheet of newspaper on the shield and mark about
where it should be cut to be the right length for your cross
(I'll give some directions on doing initials in a moment)
lay the rolled up sheet of newspaper on the shield and mark about
where it should be cut to be the right length for your cross
(I'll give some directions on doing initials in a moment)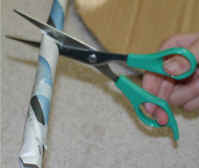 cut the tube of newspaper (making sure both sides of the cut have
tape on them so nothing unravels after you make the cut)
cut the tube of newspaper (making sure both sides of the cut have
tape on them so nothing unravels after you make the cut)- Use the masking tape to tape the piece to the shield
 Repeat the process of marking, cutting and taping for each side of
the cross
Repeat the process of marking, cutting and taping for each side of
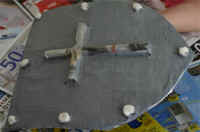
the cross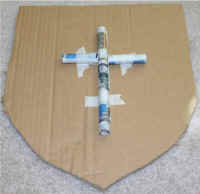 once you have everything cut and taped on, your shield should look
something like the one pictured to the right.
once you have everything cut and taped on, your shield should look
something like the one pictured to the right.
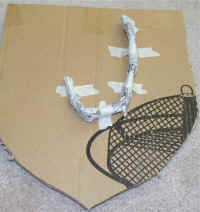
 STRAIGHT LINE LETTERS:
- if you are making a letter that is all straight lines use the newspaper tube method just like we did for the cross
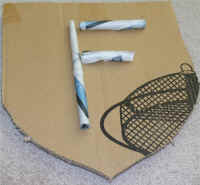
 CURVED LETTERS:
- if you are making a curved letter:
- scrunch up a long piece of newspaper and use masking tape in a number of spots to keep it from unraveling
- shape it on the shield into the shape of the letter, trimming it shorter as necessary -- use masking tape to keep it in its shape.
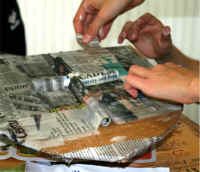 Paper Mache the shield (we just did the front side, but you can do
the front and the back -- I would suggest doing them in separate
sittings though or it may have trouble drying.
Paper Mache the shield (we just did the front side, but you can do
the front and the back -- I would suggest doing them in separate
sittings though or it may have trouble drying.- See our How to Paper Mache section for how to make paper mache mix and tips on applying it
- Cover the shield with one or two layers of paper mache newspaper strips -- make sure you push the strips into the edges of the raised part so you don't lose the shape of your cross or letter
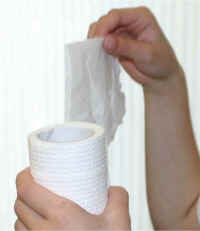 ok, everyone should have a roll of craft toilet paper *laugh* -- we
use it for all sorts of projects (including covering over paper mache
items with a white layer so they're easier to paint)
ok, everyone should have a roll of craft toilet paper *laugh* -- we
use it for all sorts of projects (including covering over paper mache
items with a white layer so they're easier to paint)- Anyways! take a sheet of toilet paper off the roll and scrunch it up
- Dip the toilet paper in the paper mache paste and put it on the corner of the shield.
 Repeat with 7 more sheets, placing the "blobs" around the
shield with about even spacing. These blobs will be the bolts on
the shield
Repeat with 7 more sheets, placing the "blobs" around the
shield with about even spacing. These blobs will be the bolts on
the shield- Set your shield aside in a safe, preferably breezy, place to dry for 24 to 48 hours (the time it takes depends on the humidity in your area and the amount of mache you used)
 paint your shield the base color (in my case it was grey)
- You can paint the entire thing, but then you have to wait until it's dry to do the second color -- I just painted around the 3D items (it isn't hard to do)
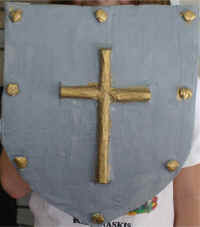 paint the raised parts of the shield your accent color (in my case
it was gold)
paint the raised parts of the shield your accent color (in my case
it was gold)- let dry
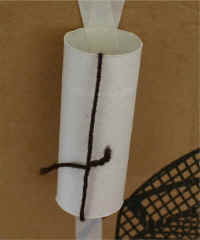 put a piece of string through the toilet paper roll and tie a loop.
- tape the toilet paper roll onto the back of the shield -- use lots of tape.
- you can hold the shield by the toilet paper roll or by the string
Printable version of these instructions