DLTK's Bible Activities for Kids
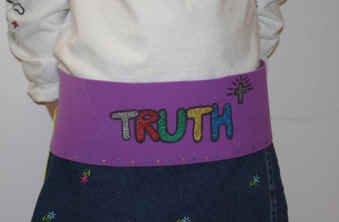
Belt of Truth Craft
Contributed by
[Simple Version] [Harder Version]
The Belt of Truth Craft is a wearable craft intended to be made in conjunction with the song "Armor of God".
The Simple Version can be done by any age (they're basically just decorating a piece of fun foam or card stock).
The more difficult version can be done by Age 6+ and teaches braiding.
In my children's opinion the Simple Version looks more like a "boy belt" and the Hard Version looks more like a "girl belt", so you can also split by gender if you like (or let the kids pick which they want to do).
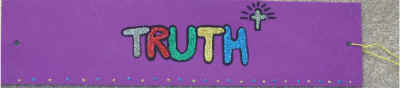
Simple Version
 Materials:
- fun foam or thin cardstock/posterboard (12" x 4")
- wool, string or ribbon
- markers or gel pens
- hole punch
- scissors
- OPTIONAL: stickers
Directions
- Have an adult cut a piece of fun foam or thin cardstock about 12 inches long and 4 inches wide (you can make it a bit shorter if you're doing this for preschoolers or toddlers).
- Punch a hole on either of the long ends of the fun foam

- Tie a piece of string to each end of the foam. The strings should be long enough to tie in a bow behind the child when they're wearing their belt.
- OPTIONAL: An adult can outline the word TRUTH in bubble letters in the center of the belt for younger children to color in.
- Use markers or gel pens to print the word TRUTH in the center of the belt
- Use markers or gel pens or even stickers to decorate the remainder of the belt. You can add a border, draw a cross or a dove or just some geometric designs.
- To wear, tie the strings in a bow behind the child's back.
Hard(er) Version:
Materials:
- thick wool (preferably macrame cord) - 3 pieces each about 5 feet long
- for beginner braiders, use three different colors
- if you only have thin wool, take 4 to 10 pieces and knot them together every 6 inches or so. Your pieces should be about 6 feet long to start to make up for all the extra knots.
- OPTIONAL: large holed beads
- Short (about 12") piece of string, ribbon or thin wool
- Optional: Beads with letters on them (you need the letters for TRUTH)
- you can purchase these at the craft store
OR - Make your own or have an adult make them for the class using
- white sculpy clay
OR - our home made bead
clay
AND - black marker
Make 5 beads (cube shaped are best, but round will work too) per student and let them print the letters TRUTH (one letter per bead)
- white sculpy clay
- you can purchase these at the craft store
Directions
- The directions are simple, but it will take awhile to teach the "art" of braiding to the children
- Line up all 3 pieces of cord and tie it so there's an end about 10 inches long.
- Braid! until you have a belt long enough to go around the waist. Tie another knot and trim the ends so there's about 10 inches of free cord again
- OPTIONAL: Add a large holed beads to as many of the "free cords" as you like tying a knot at the end so the bead doesn't fall off
- This is a good "mentoring" project. Older children or adults can hold the cord while the younger children braid. If you don't have someone to hold the cord, use masking tape to tape the knotted end to the floor or table.
- Thread your lettered beads onto a separate, thin piece of string or wool and tie it to the front of your belt (beside one of the finishing knots.
- Tie a loose knot to wear your belt.
TIPS FOR SUCCESS:
- Before you start, sit back and figure out exactly how much time you have
to do the project.
- Set aside 5 minutes at the beginning for "teaching" and 5 minutes at the end for clean up
- Now split your remaining time into 3 equal portions (let's say each
portion is 10 minutes).
- at the end of the first 10 minutes, go to each belt and tie it off. Now tie a second knot at where they "should be" at 1/3rd of the way through the project. Keep in mind you want about 10 inches of free cord at the end of the project. Let the kids start braiding again from there.
- At the end of the second 10 minutes, repeat the process, tying off where the children have reached and a second time where they should be (2/3rds through).
- At the end of the last 10 minutes, tie off the project and tie off where it needs to be to go around their waist.
- This will give you a belt with a BRAID, STRAIGHT, BRAID, STRAIGHT, etc pattern and will ensure everyone gets done in the time allotted.
Printable version of these instructions